Exercises
7.4: redux, step1
Refactor the application from using internal React component state to using Redux for the application's state management.
Additionally, change the application's notifications to use Redux at this point of the exercise set.
7.5 redux, step2
Store the information about blog posts in the Redux store.
You are free to manage the state for logging in and creating new blog posts by using the internal state of React components.
This and the next exercise are quite laborious but incredibly educational.
7.6 redux, step3
Store the information about the signed in user in the Redux store.
7.7 Users view
Implement a view to the application that displays all of the basic information related to users:

7.8 Individual user view
Implement a view for individual users, that displays all of the blog posts added by that user:

You can access the view by clicking the name of the user in the view that lists all users:

NB1: if your application uses Redux for state management, it may be beneficial to use the second ownProps parameter of mapStateToProps. It is quite simple to use despite the slightly obscure documentation.
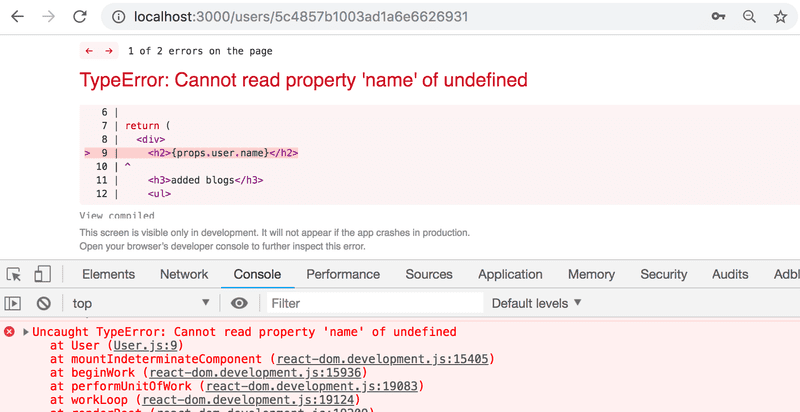
NB2: you will almost certainly stumble across the following error message during this exercise:

The error message will occur if you refresh the page for an individual user.
The cause of the issue is that when we navigate directly to the page of an individual user, the React application has not yet received the data from the backend. One solution for fixing the problem is to use conditional rendering:
const User = (props) => {
if ( props.user === undefined) { return null }
return (
<div>
<h2>{props.user.name}</h2>
<h3>added blogs</h3>
</div>
)
}
7.9 Blog view
Implement a separate view for blog posts. You can model the layout of your view after the following example:
.

Users should be able to access the view by clicking the name of the blog post in the view that lists of all of the blog posts.

After you're done with this exercise, the functionality that was implemented in exercise 5.6 is no longer necessary. Clicking a blog post no longer needs to expand the item in the list and display the details of the blog post.
7.10 Navigation
Implement a navigation menu for the application:

7.11 comments, step1
Implement the functionality for commenting on blog posts:

Comments should be anonymous, meaning that they are not associated to the user who left the comment.
In this exercise it is enough for the frontend to only display the comments that the application receives from the backend.
An appropriate mechanism for adding comments to a blog post would be an HTTP POST request to the api/blogs/:id/comments endpoint.
7.12 comments, step2
Extend your application so that users can add comments to blog posts from the frontend:

7.13 Styles, step1
Improve the appearance of your application by applying one of the methods shown in the course material.
7.14 Styles, step2
You can mark this exercise as finished if you use an hour or more for styling your application.
7.15 ESLint
Configure the frontend of your application to use ESLint
7.16
Implement a suitable webpack configuration for your application from scratch.
7.17 End to end testing, step1
Implement at least two end to end tests for your application with the Cypress library. One suitable use case for testing would be logging in to the application with an existing user.
You can assume that the state of the database is suitable for your tests in this exercise. In the example use case described above, you would assume that your application already has one registered user.
It is recommended to spend some time reading through the documentation for Cypress. The best practices page in particular contains a lot of valuable tips that are good to keep in mind when writing your tests.
7.18 End to end testing, step2
Expand your E2E tests so that the tests initialize the state of the database always before the tests are executed. Write at least one test that modifies the application's database e.g. by creating a new blog post.
7.19 End to end testing, step3
Expand the coverage of your E2E tests. You can mark this exercise as finished if you have used at least 30 minutes on this exercise.
7.20 Course feedback
How did we do? Give us some feedback for the course in Moodle!
This was the last exercise for this part of the course and it's time to push your code to GitHub and mark all of your finished exercises to the exercise submission system.


